Monday, May 19, 2014

Choosing the Correct Engine Oil


It’s time to change the oil in your car, but when you go to the store, you find that many different types of engine oil are available.  Which one should you choose?

Go to your nearest automotive parts store or retail super center.  Locate the large selection of engine oil.  The viscosity of the engine oil should be clearly labeled on the bottle.  This will be a series of numbers and letters, like 10W-30.  Viscosity is the measure of resistance of the oil as it is being deformed by stress.  The first part of the number in the viscosity rating, (ex. 10W) refers to the weight (10) of the oil and whether it is rated (W) for winter use.  The second part of the number (ex. -30) refers to how thin the weight of the oil will be when it is warmed to operating temperature.  The oil actually changes viscosity when heated due to the addition of polymers by the manufacturer.

5W viscosity oil is thin oil and circulates quickly.  It is used for lower temperatures.
5W-20 viscosity oil is used for outside temperatures ranging from -20 °F to 0 °F.
5W-30 viscosity oil is used for outside temperatures ranging from -20 °F to 60 °F.

10W oil is thicker than 5W and is suitable for most temperatures.
10W viscosity oil is used for outside temperatures ranging from 0 °F to 60 °F.
10W-30 viscosity oil is used for outside temperatures ranging from 0 °F to 100 °F.
10W-40 viscosity oil is used for outside temperatures ranging from 0 °F to 100 °F.

20W-20 viscosity oil is used for outside temperatures ranging from 20 °F to 100 °F.
20W-40 viscosity oil is used for outside temperatures ranging from 20 °F to 100 °F.
20W-50 viscosity oil is used for outside temperatures ranging from 20 °F to 100 °F.

Always check the manufacturer’s specifications for your engine before adding or changing the oil and never mix oils of different viscosity together.  Remove one before adding the other and be sure to change the oil filter.

Monday, May 5, 2014

Installing an Electric Iron and Ironing Board Holder


A hot iron sitting on an ironing board is an accident waiting to happen when there are small children running around your home.  Install a device that will store the iron and board safely away and also free up needed space.

Choose the best place for the iron and board to be stored.  This may be in a closet or bathroom area, but it should be a room with a door that can be closed in order to prevent access to it by small children.  It is also a good idea to store the iron and board in a low-traffic area that is not frequently accessed by guests.

Using an electronic stud finder, locate the left and right edges of a wooden stud inside your wall.  Mark the edges lightly with a pencil so that you will know where the middle of the stud is.  These marks should be made in close proximity to the position on the wall where you will mount the holder.

Position the plastic holder on the wall in the area where you would like it to be permanently mounted.  Firmly hold the plastic holder with one hand and with your other hand, hang the ironing board on the holder to be sure the holder is positioned high enough for the board to clear the floor.  If there is a door nearby, check it for clearance too.  Remove the board from the holder and align the holder so that that center mounting holes are between the pencil lines that you made to mark the wooden stud.  Mark these holes using your pencil.  It is a good idea to also check the sides of the holder using a level.  If the holder is level, the board will hang level when the installation is complete.

Remove the holder from the wall and drill small pilot holes for each mounting hole.  The pilot holes should be just smaller than the screw that will occupy the hole.  If any of the screws do not match up with the wooden stud, insert a wall anchor to provide extra support.  Place the plastic holder back onto the wall and apply screws to each one using your Phillips screwdriver.  Do not over tighten the screws!

Insert the iron and wrap the cord so that it fits underneath.  Insert the board and inspect the installation from all sides.  Pull on the board and make sure the holder doesn’t budge.


Friday, May 2, 2014

How to Back Up a Trailer


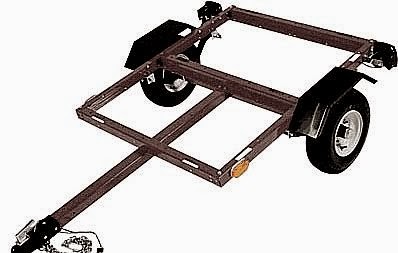
So you just bought a new trailer and you are learning how to drive with it? Things seem pretty easy at first. The trailer just tags along and follows you wherever you go. Now put the vehicle in reverse and try to maneuver the trailer into a parking spot or up to a specific place on a loading dock. Reverse driving with a trailer is not quite as easy as forward driving, but with practice, it will become second nature. Here are a few tips on how to back up your trailer with ease
Be sure that the trailer, or some part of the back of it, is visible to you as you drive. If the vehicle is taller than the trailer, attach something to the trailer on one or both of the back corners that extends up high enough to be seen by the driver. A flag or colored post would be perfect for this task.
Remember, when you are driving in reverse, the trailer will travel in the opposite direction of the way the steering wheel is turned. If you are backing up a trailer and it turns way too far, don't panic, just drive the vehicle forward until the trailer straightens out. A helpful tip for backing into driveways is to drive past the driveway or entrance on the same side of the road as the entrance until the trailer has just passed it. You should turn the vehicle at the end of this approach so that it is facing the opposite side of the road at a slight angle. When you begin to back up, you will notice that the trailer maneuvers much easier and doesn't have as far to travel to make the turn. You will need to turn the steering wheel towards the direction of the opposite side of the road as you back up. This approach will help to keep the vehicle from having to venture off-road in order to correctly angle the trailer. Just be mindful of traffic in both directions as you attempt this.
For practice, find a parking lot with few or no cars to practice driving in reverse. Weekends are a good time for this. Take along some obstacles like road cones to set up different scenarios and learn the best way to approach each one. Also practice driving backwards with a trailer in a straight line and learn how to judge distances. If you spend much of your time driving the trailer by yourself, it may not be a bad idea to install a sensor on the back that will detect when an object is within a certain distance of the back of the trailer. If there are people around, it doesn't hurt to ask someone stand behind the trailer to help you as you back up. Most people won't mind offering a helping hand.